Step 1: Buy a Domain Name
Go to any domain registrar (like Namecheap, GoDaddy, or Porkbun).
Search for a domain name, choose one that is available, and complete the purchase.

Go to any domain registrar (like Namecheap, GoDaddy, or Porkbun).
Search for a domain name, choose one that is available, and complete the purchase.
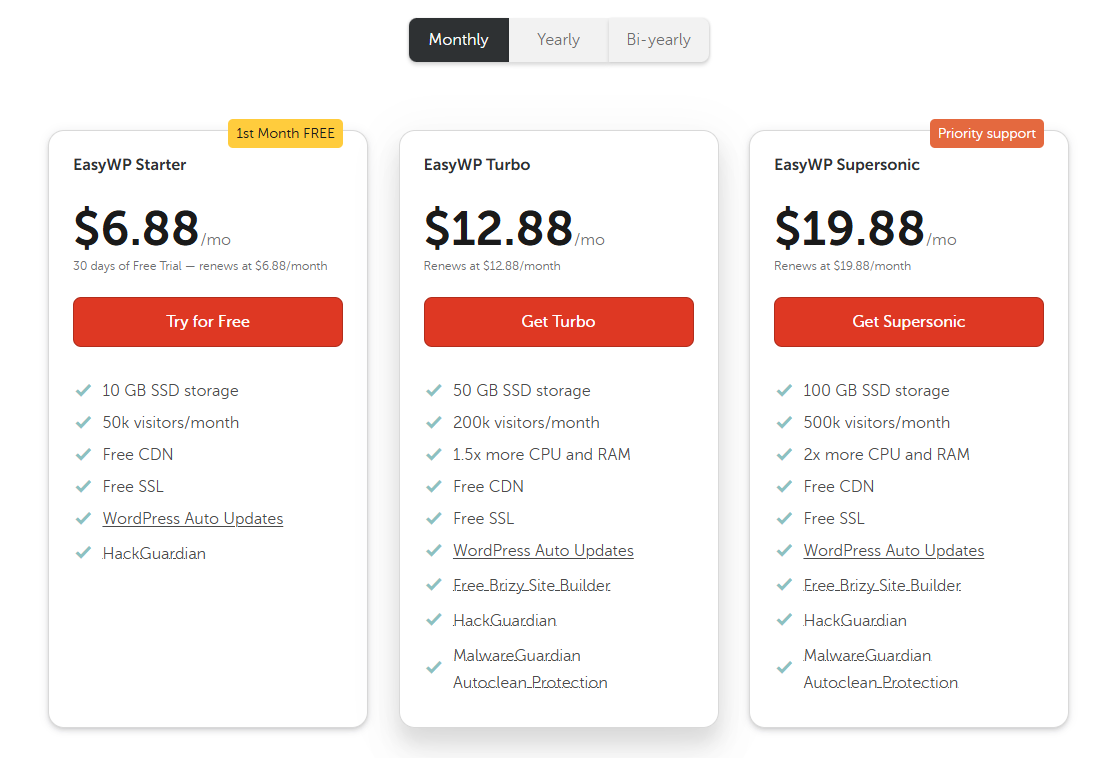
Choose a hosting company that supports WordPress (e.g. SiteGround, Hostinger, Bluehost).
Select a plan — for beginners, the basic shared hosting plan is usually enough.
Complete the registration and get your hosting login details.
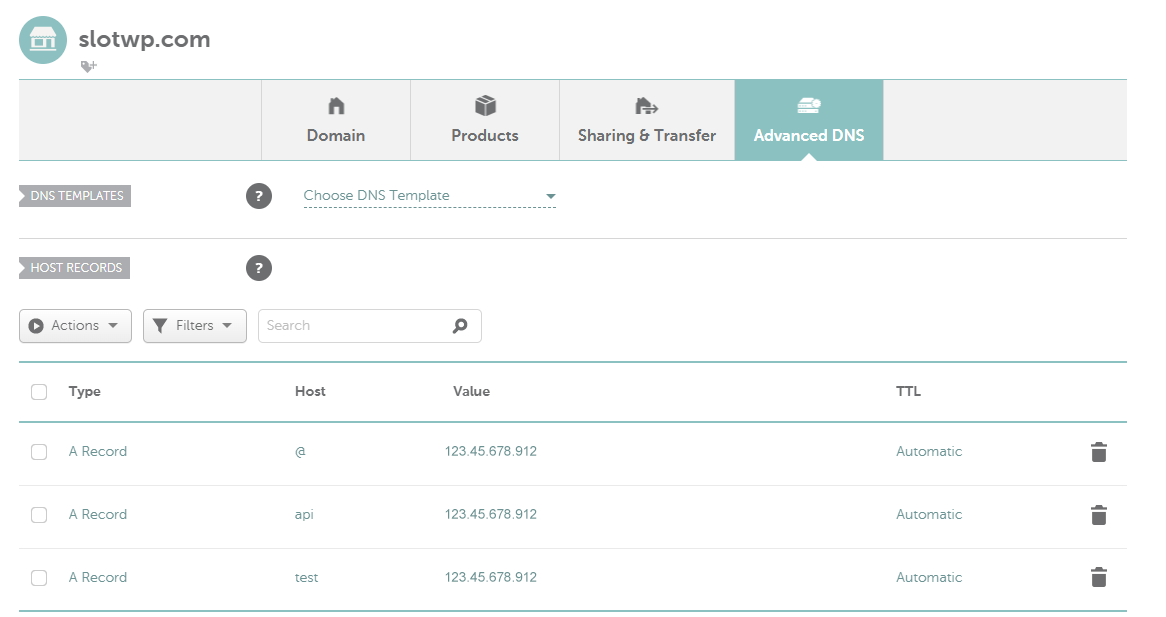
Login to your domain registrar and look for DNS settings.
Update the nameservers to match your hosting provider’s DNS (usually emailed to you).
Login to your hosting dashboard (you’ll receive a link after buying hosting).
In the control panel (usually cPanel), scroll to the “Auto Installer” section.
Click on WordPress to start the installation process.

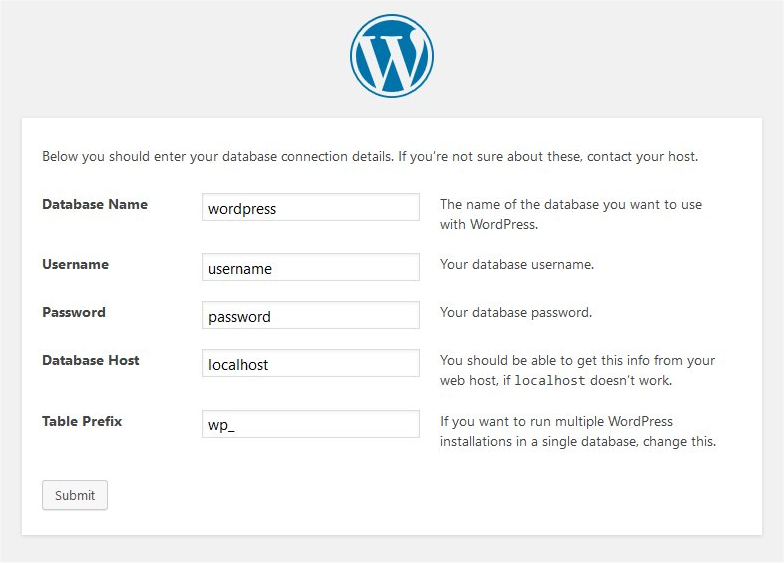
Fill in your website details:
Click Install. The process will take a few seconds to complete.
Once installed, go to your new WordPress site:
https://yourdomain.com
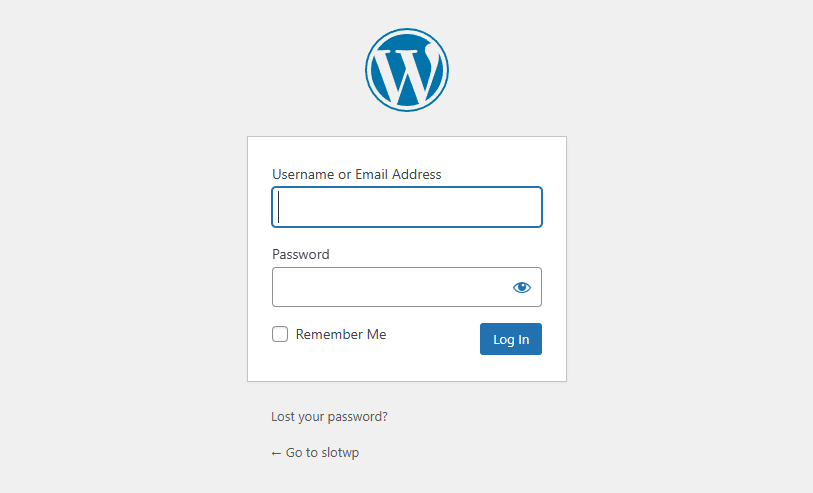
To access the admin dashboard:
https://yourdomain.com/wp-admin
Login using the username and password you just created.
Your WordPress site is now live. You can now choose a theme, install plugins, and start creating content.
Happy building! 🚀